Homemade Peanut Butter Cups with Crunchy Quinoa
Highlighted under: Oven Inspiration
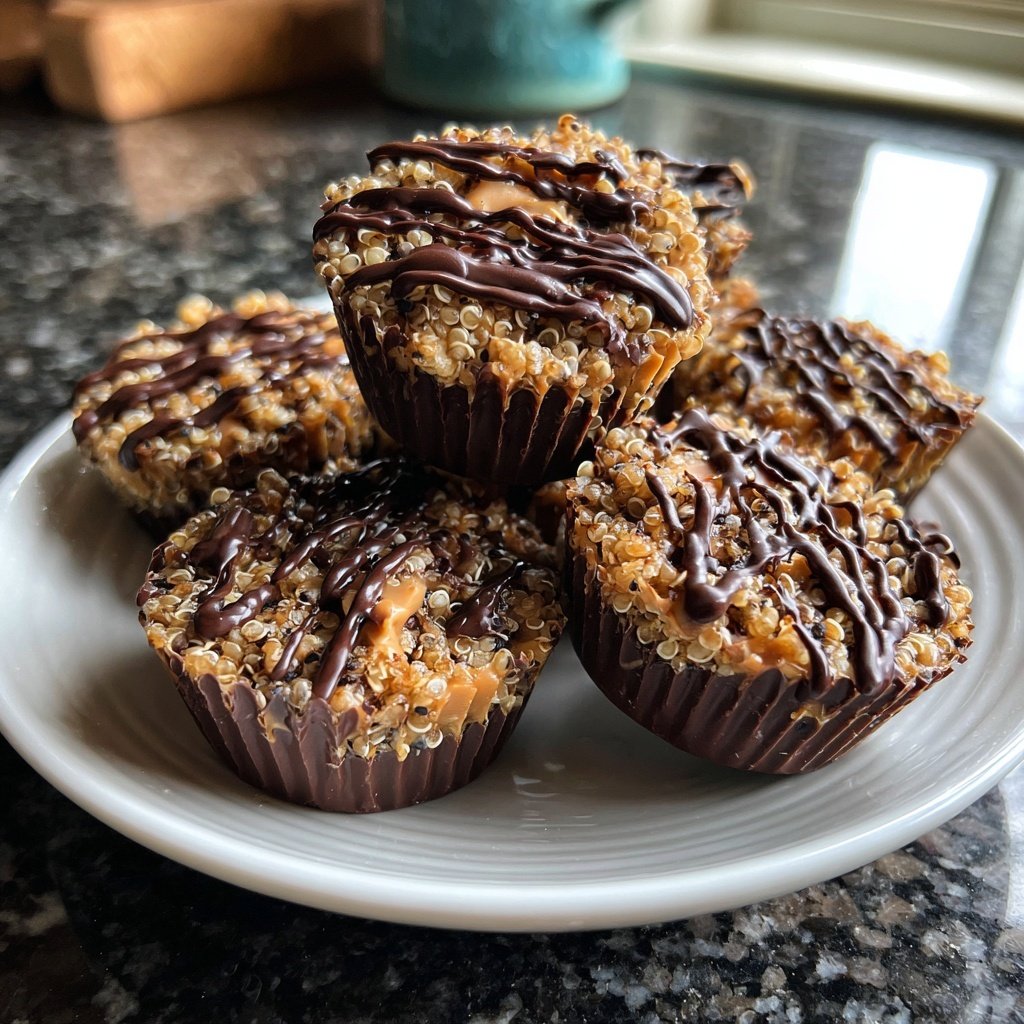
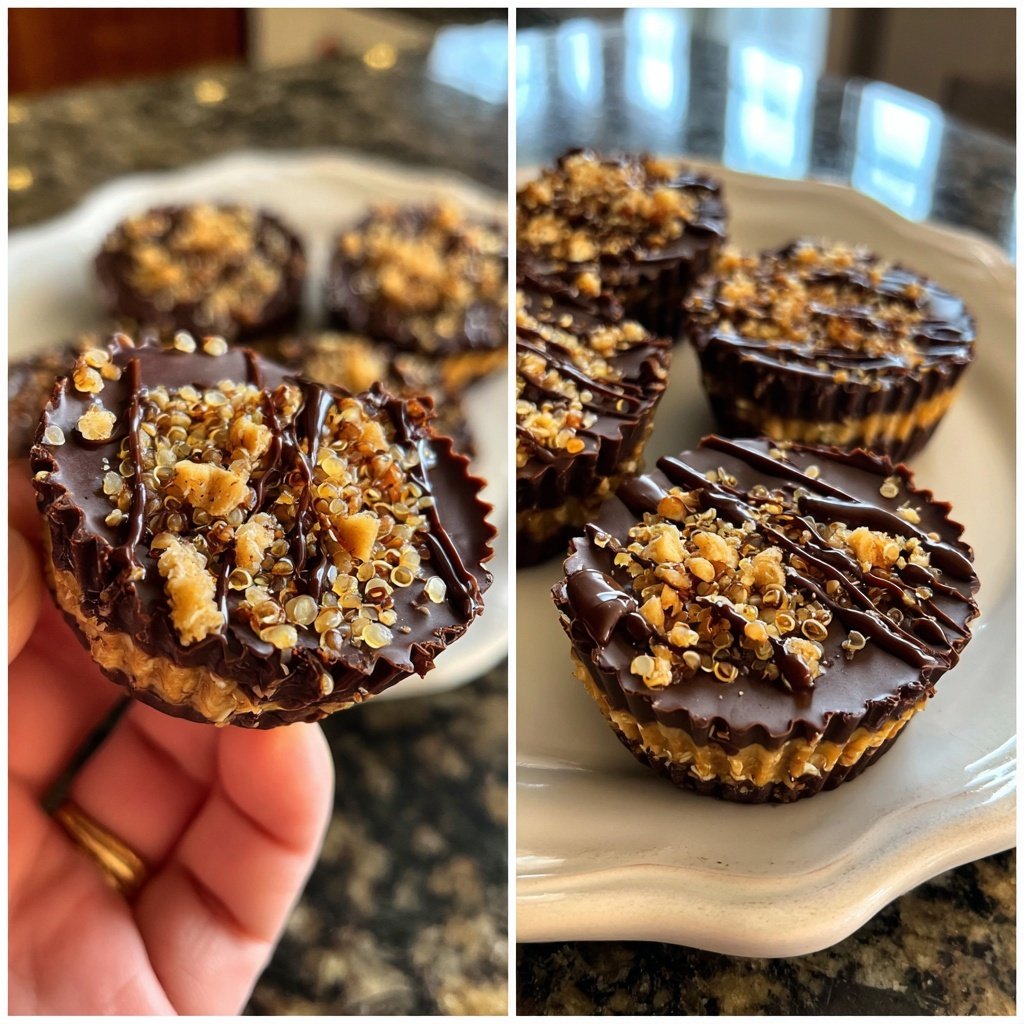
I've always been a fan of peanut butter cups, but when I discovered how to make them at home, I was thrilled! The satisfaction of creating my own sweet treat with a crunchy twist is unparalleled. Adding quinoa not only gives these cups an exciting texture, but it also provides a nutritious boost. Each bite is a delightful mix of creamy peanut butter and rich chocolate, making it a perfect indulgence for any occasion. Let me take you through my journey of crafting these delicious cups.
While experimenting in the kitchen, I discovered that incorporating crunchy quinoa into the classic peanut butter cup recipe elevates the texture and flavor profile. I was amazed at how well the nutty crunch complements the creaminess of the peanut butter. This simple addition transforms an already beloved treat into something extraordinary.
During my trials, I found that using high-quality chocolate not only enhances the richness but also creates a beautiful sheen when melted. This tip has made my homemade peanut butter cups not just delicious but also visually appealing. Each batch has become a delightful treat for friends and family!
Why You'll Love These Peanut Butter Cups
- A unique crunchy texture from the quinoa adds an unexpected twist
- Ultra-satisfying combination of sweet, salty, and creamy layers
- Made with simple ingredients, perfect for homemade gifting
Mastering the Chocolate Layer
The chocolate layer is crucial for the overall texture and flavor of these peanut butter cups. I highly recommend using quality dark chocolate chips with at least 60% cocoa content for a rich taste that balances well with the sweet peanut butter filling. Melting the chocolate with a tablespoon of coconut oil not only helps it to have a glossy finish but also makes it easier to work with when cooling, preventing the chocolate from becoming too hard.
Be sure to melt the chocolate in a microwave-safe bowl, stopping to stir every 30 seconds. This prevents scorching, which can ruin the chocolate's smooth consistency. Once melted, let it cool slightly before pouring it into the muffin liners to avoid inadvertently warming the peanut butter filling, ensuring clean layers.
Understanding the Peanut Butter Filling
The filling combines creamy peanut butter with honey or maple syrup, creating a deliciously sweet and salty contrast against the chocolate. If you're looking to substitute for dietary preferences, you can use almond or cashew butter; just ensure they are creamy varieties for the best texture. The addition of crunchy quinoa adds not only a satisfying crunch but also a nutritious aspect, perfect for those looking to add some fiber and protein.
When mixing these ingredients, aim for a cohesive blend with no visible streaks of peanut butter. This ensures a unified flavor with every bite. If the mixture feels too stiff, a tiny splash of milk or a bit more honey will help achieve a creamier texture.
Ingredients
Gather these ingredients to create your peanut butter cups:
For the Chocolate Layer
- 1 cup dark chocolate chips
- 1 tablespoon coconut oil
For the Peanut Butter Filling
- 1 cup creamy peanut butter
- 1/4 cup honey or maple syrup
- 1/2 cup crunchy quinoa
- 1/4 teaspoon sea salt
Now that you have everything, let's start making these treats!
Instructions
Follow these simple steps to make your homemade peanut butter cups:
Prepare the Chocolate Layer
In a microwave-safe bowl, melt the dark chocolate chips and coconut oil together in 30-second intervals, stirring in between until smooth. Set aside.
Make the Peanut Butter Filling
In a separate bowl, mix together the peanut butter, honey or maple syrup, crunchy quinoa, and sea salt until well combined.
Assemble the Cups
Line a muffin tin with paper liners. Pour a layer of melted chocolate into each liner, just enough to cover the bottom. Freeze for about 10 minutes until set.
Add Peanut Butter Mixture
Remove the muffin tin from the freezer and add a spoonful of peanut butter filling on top of the chocolate layer in each cup. Spread it evenly.
Top with More Chocolate
Pour the remaining melted chocolate over the peanut butter filling, ensuring it's completely covered. Tap the tin gently on the counter to remove air bubbles.
Chill and Serve
Return the muffin tin to the freezer for another 20 minutes until the cups are fully set. Once hardened, remove the cups from the liners and enjoy!
Enjoy these delicious homemade peanut butter cups!
Pro Tips
- For a sweeter treat, feel free to adjust the amount of honey or maple syrup in the peanut butter filling to your taste. You can also experiment with different types of chocolate for varying flavors.
Making Ahead and Storage Options
These peanut butter cups are perfect for making ahead of time. You can easily prepare a batch and store them in an airtight container in the refrigerator for up to two weeks. If you prefer to freeze them, simply place the cups in a freezer-safe container separated by layers of parchment paper. They can be frozen for up to three months. When you're ready to enjoy them, let them sit at room temperature for about 10-15 minutes to soften slightly.
For those who want to garnish their peanut butter cups, consider a sprinkle of sea salt or a drizzle of melted chocolate before chilling. This adds a gourmet feel and enhances the flavors even more. Just be wary not to overload them; a little goes a long way!
Tips for Perfect Assembly
When lining the muffin tin, consider using silicone liners instead of paper ones. This will make it easier to pop the cups out once they're set. Ensure you fill each liner just enough with melted chocolate to cover the bottom without spilling over the edges; about 2-3 tablespoons should be sufficient. A gentle tapping of the tin on the counter after filling can help settle the chocolate and remove air bubbles.
If you notice a little overflow when pouring the chocolate over the peanut butter filling, don’t panic! Use a small spatula or knife to smooth it back down while it’s still soft. It’s all about achieving that perfect layer, as both flavors and textures meld together in each delicious bite.
Questions About Recipes
→ Can I use natural peanut butter?
Yes, natural peanut butter works well, but make sure to stir it thoroughly as it can be runny.
→ How do I store the peanut butter cups?
Store in an airtight container in the refrigerator for up to two weeks or freeze for longer storage.
→ Can I substitute quinoa with something else?
If you prefer, you can use crushed nuts or seeds for a different crunch!
→ How can I make these vegan?
Use a vegan chocolate and substitute honey with maple syrup or agave nectar.
Homemade Peanut Butter Cups with Crunchy Quinoa
Created by: Kerensa Trelawney
Recipe Type: Oven Inspiration
Skill Level: Intermediate
Final Quantity: 12 cups
What You'll Need
For the Chocolate Layer
- 1 cup dark chocolate chips
- 1 tablespoon coconut oil
For the Peanut Butter Filling
- 1 cup creamy peanut butter
- 1/4 cup honey or maple syrup
- 1/2 cup crunchy quinoa
- 1/4 teaspoon sea salt
How-To Steps
In a microwave-safe bowl, melt the dark chocolate chips and coconut oil together in 30-second intervals, stirring in between until smooth. Set aside.
In a separate bowl, mix together the peanut butter, honey or maple syrup, crunchy quinoa, and sea salt until well combined.
Line a muffin tin with paper liners. Pour a layer of melted chocolate into each liner, just enough to cover the bottom. Freeze for about 10 minutes until set.
Remove the muffin tin from the freezer and add a spoonful of peanut butter filling on top of the chocolate layer in each cup. Spread it evenly.
Pour the remaining melted chocolate over the peanut butter filling, ensuring it's completely covered. Tap the tin gently on the counter to remove air bubbles.
Return the muffin tin to the freezer for another 20 minutes until the cups are fully set. Once hardened, remove the cups from the liners and enjoy!
Extra Tips
- For a sweeter treat, feel free to adjust the amount of honey or maple syrup in the peanut butter filling to your taste. You can also experiment with different types of chocolate for varying flavors.
Nutritional Breakdown (Per Serving)
- Calories: 250 kcal
- Total Fat: 17g
- Saturated Fat: 5g
- Cholesterol: 0mg
- Sodium: 75mg
- Total Carbohydrates: 22g
- Dietary Fiber: 2g
- Sugars: 12g
- Protein: 6g